go to the home page
go to the page above this one – dovetail – links
Dovetail – type 3 – The tapered gib – side to side
The “tapered” gib is also trapezoidal in cross section but it tapers from side to side along its length.
The tapered gib achieves a similarly rigid mechanism but in a completely different way.
For it to work one side of the female dovetail also has to be tapered along its length. The taper works like a wedge that fills the space between the male and female parts. But for the dovetail to still work it is essential that when it is fitted next to the female part the edges touching the male part are parallel. Of course, the sides of the male part have to be perfectly parallel as in all other case.

725 – Tapered gib on capstan attachment
(Usually a tapered gib is never exposed since ot is fitted to the female part of the dovetail. Usually the male part never “leaves” either end of the female part. It is only because of the way a capstan works it can be seen in this case.)
Fig. – drawing of dovetail using a tapered gib 1041
The taper required is such that a movement of the gib by, for example, 10mm, must result in a change of width of the order of 0.1mm. This too small to show up in a photo.
The angle of the taper is not critical but the angle of the taper on the gib must exactly match the angle of the taper on the female part of the dovetail.
Making a tapered gib
Suppose we have already made the male part of the dovetail. In every single type of dovetail the male part is always parallel. In this case the female part is tapered on one side and with the taper on the gib produces two edges that then mean that the two sides meeting the male part are parallel.
We now need to make the female part and the tapered gib.
Some people might have trouble making two identical tapers of exactly 1.00mm in 100mm on two occasions. The trick is to make these two parts in one setting. The angles might not be a particular value but they will be the same which is what matters.
Make the male part of the dovetail. This is exactly the same as the male parts of the previous dovetails.
Prepare the female part of the dovetail by squaring it up. It is held in a rack vice that has been aligned to the edge of the milling table.
The middle ONLY of the female part is removed with an endmill.
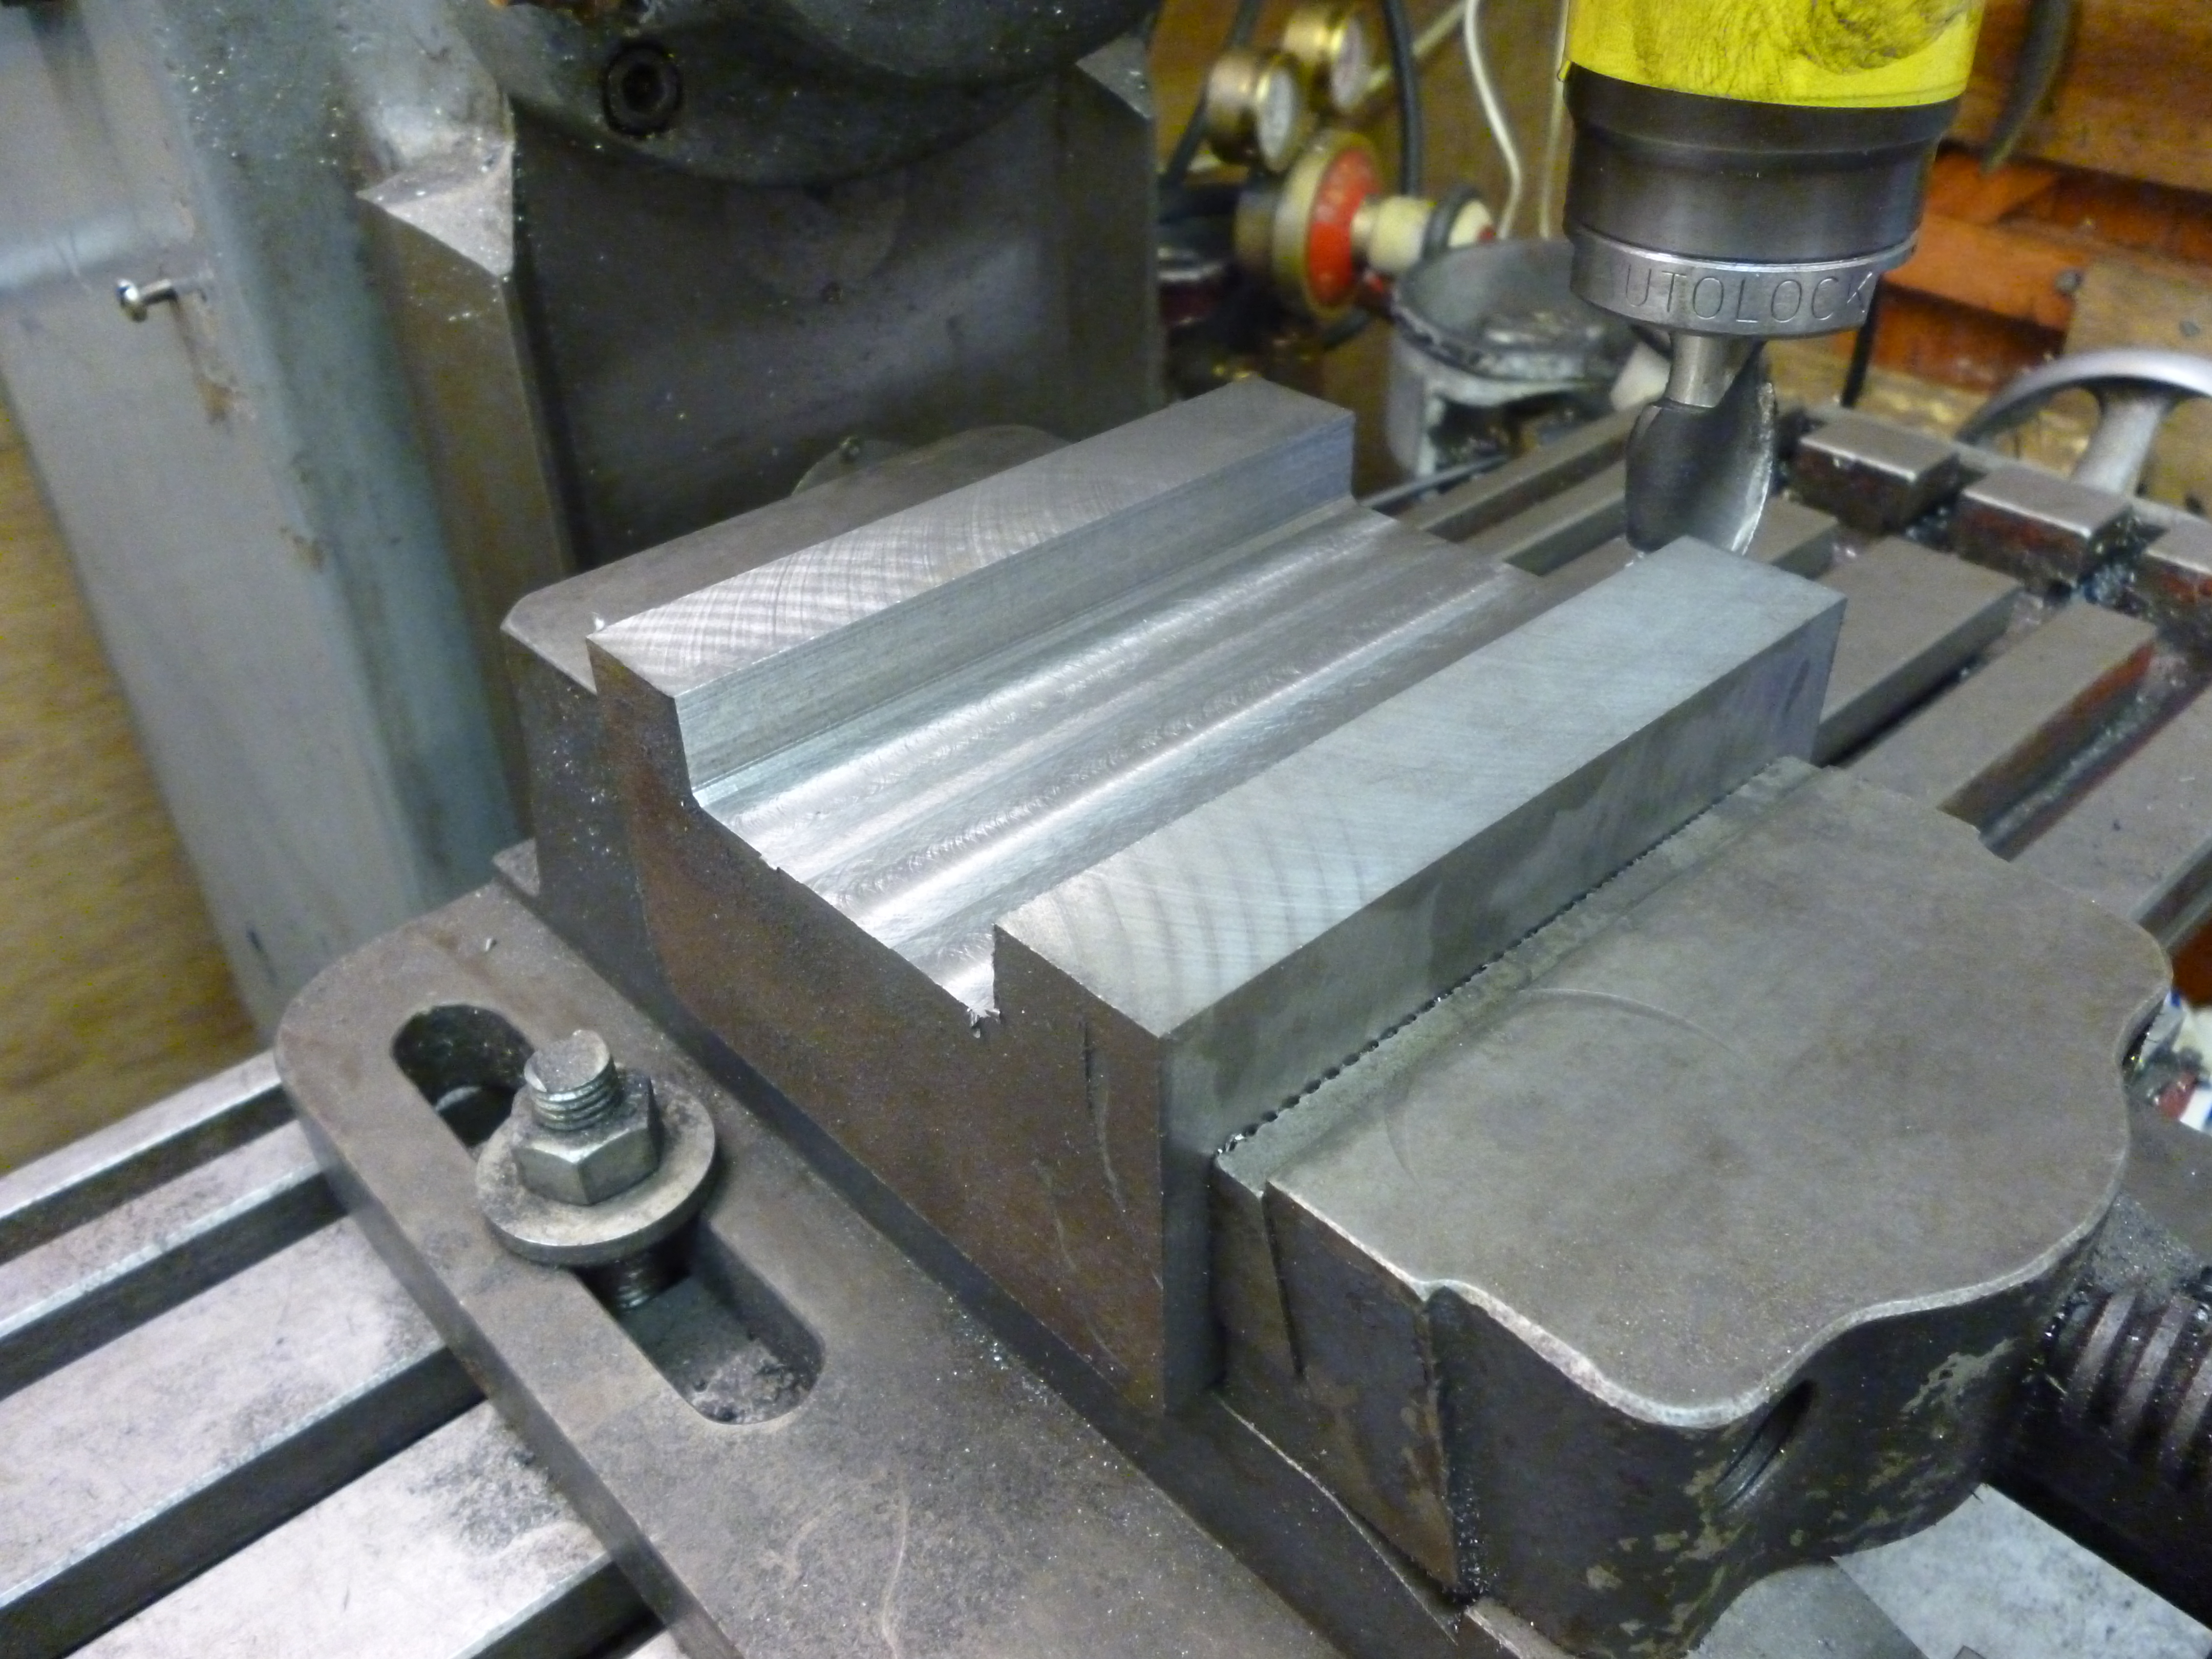
Female part being machined with an endmill – 700
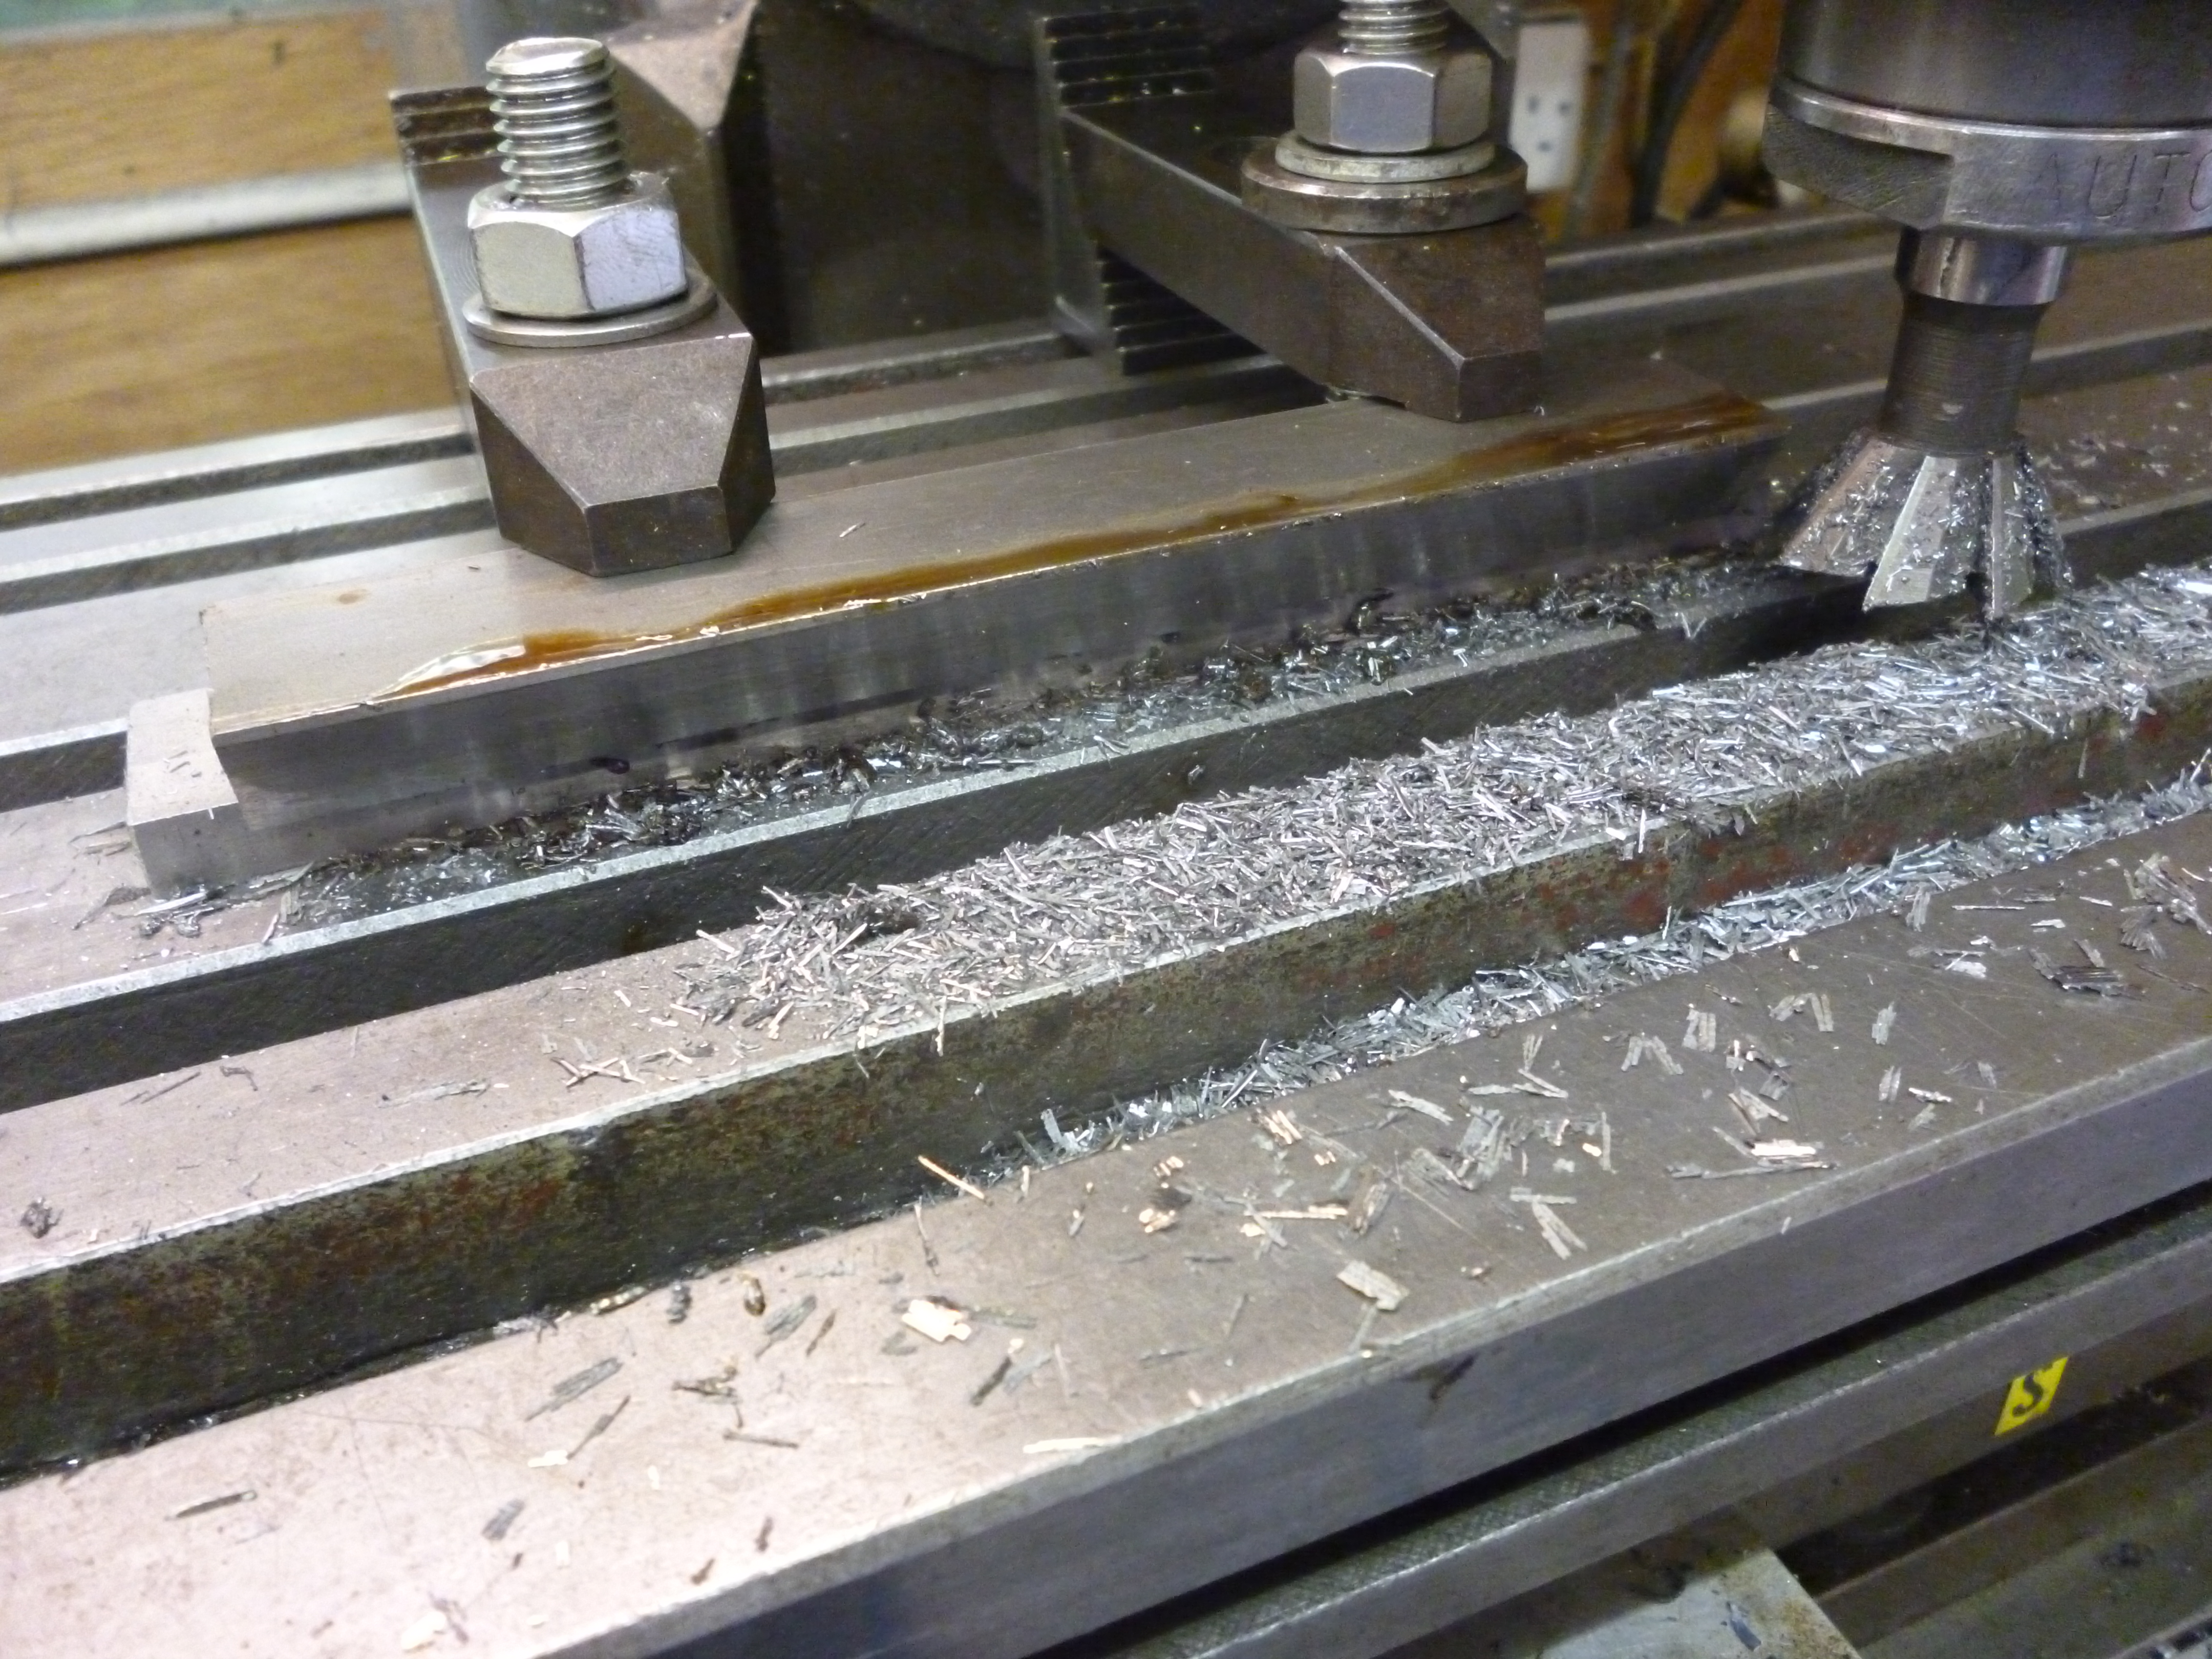
The vice with the workpiece is then rotated so that it is at an angle of about 1° off being at right angles to the milling table.
The dovetail on the near side only is then cut completely.

First side of the female part – 701
The female part is left in the vice and the vice is removed from the milling table.
The tapered gib is then cut on one side only. This is about 50mm longer than the dovetail on the female part. The gib at this stage is much wider than the final part. This is so that it can held easily by clamping.
gib machined on one side – 702
The half made tapered gib is then clamped to the dovetail on the female part. This is done so it is aligned at the narrow end on the female part.

Gib clamped to female part for drilling – 703
Holes are drilled so that the tapered gib and the female dovetail can be screwed together. This is the tapping size. The two parts are separated. The female part is drilled to the clearance size. An additional hole is made in just the female part for a locking screw. The gib is tapped from the flat side all the way through.

Gib drilled and tapped – 704
Both parts are deburred and thoroughly cleaned. They are now screwed together. The rack vice is set square to the milling table. The gib is machined with an endmill to reduce its width.

gib narrowed with an endmill – 706

Milling the second side of the gib – 705
The whole length of the gib must be cut. It is important that where the gib is not supported by the female part that it is machined very gently with the sharpest possible cutter to reduce the risk of it being cut unequally. The tapered gib is very likely to be slightly distorted so the machined surfaces are not truly flat. This can be checked with a ruler in good condition. This might only be a few hundredths. Both sides must be ground by rubbing them on a piece of emery paper on a surface plate till they are flat. The might still not be perfect but the gib can be fitted.
Without moving anything the dovetail cutter is used to just shave the surface of both flat parts of the female part. It is essential that the whole of both surfaces are cut at the same height setting.
The gib is in a position so the gap is at its widest.
The other side of the dovetail is cut in the other side of the female part. The reason for machining the male part first it that it can now be used to measure the dovetail on the female/gib part to the exact size. But since the gib is set to make the gap as big as possible it is still possible to reduce this gap by moving the gib.
The aim here is to make the width only just wide enough to take the male part.

The second side of the female part – 707
see “final cut on dovetails”
It is now possible the angles on the two tapered sides of the gib are not perfect. The gib has to be covered with a smear of blue and the male part tested against the other part. If there is a tight spot it has to be removed using emery paper. If the male part is too loose the gib can be moved to tighten things up.
For the dovetail to work the gib must touch the male part equally wherever the male part is.
MEW 144 p26
MEW 146 p56
Mechanism for adjusting the tapered gib
A tapered gib is adjusted by moving the gib along the length of the dovetail. If it is too far out the dovetail is loose. If it is too far in the dovetail will jam solid.
One method of adjusting is to have a screw that fits into the female part. This screw has a disk on it that fit a slot in the tapered gib. The gib is adjust by moving the gib in or out and then locked with a nut. It has to be locked so it cannot move either in or out.
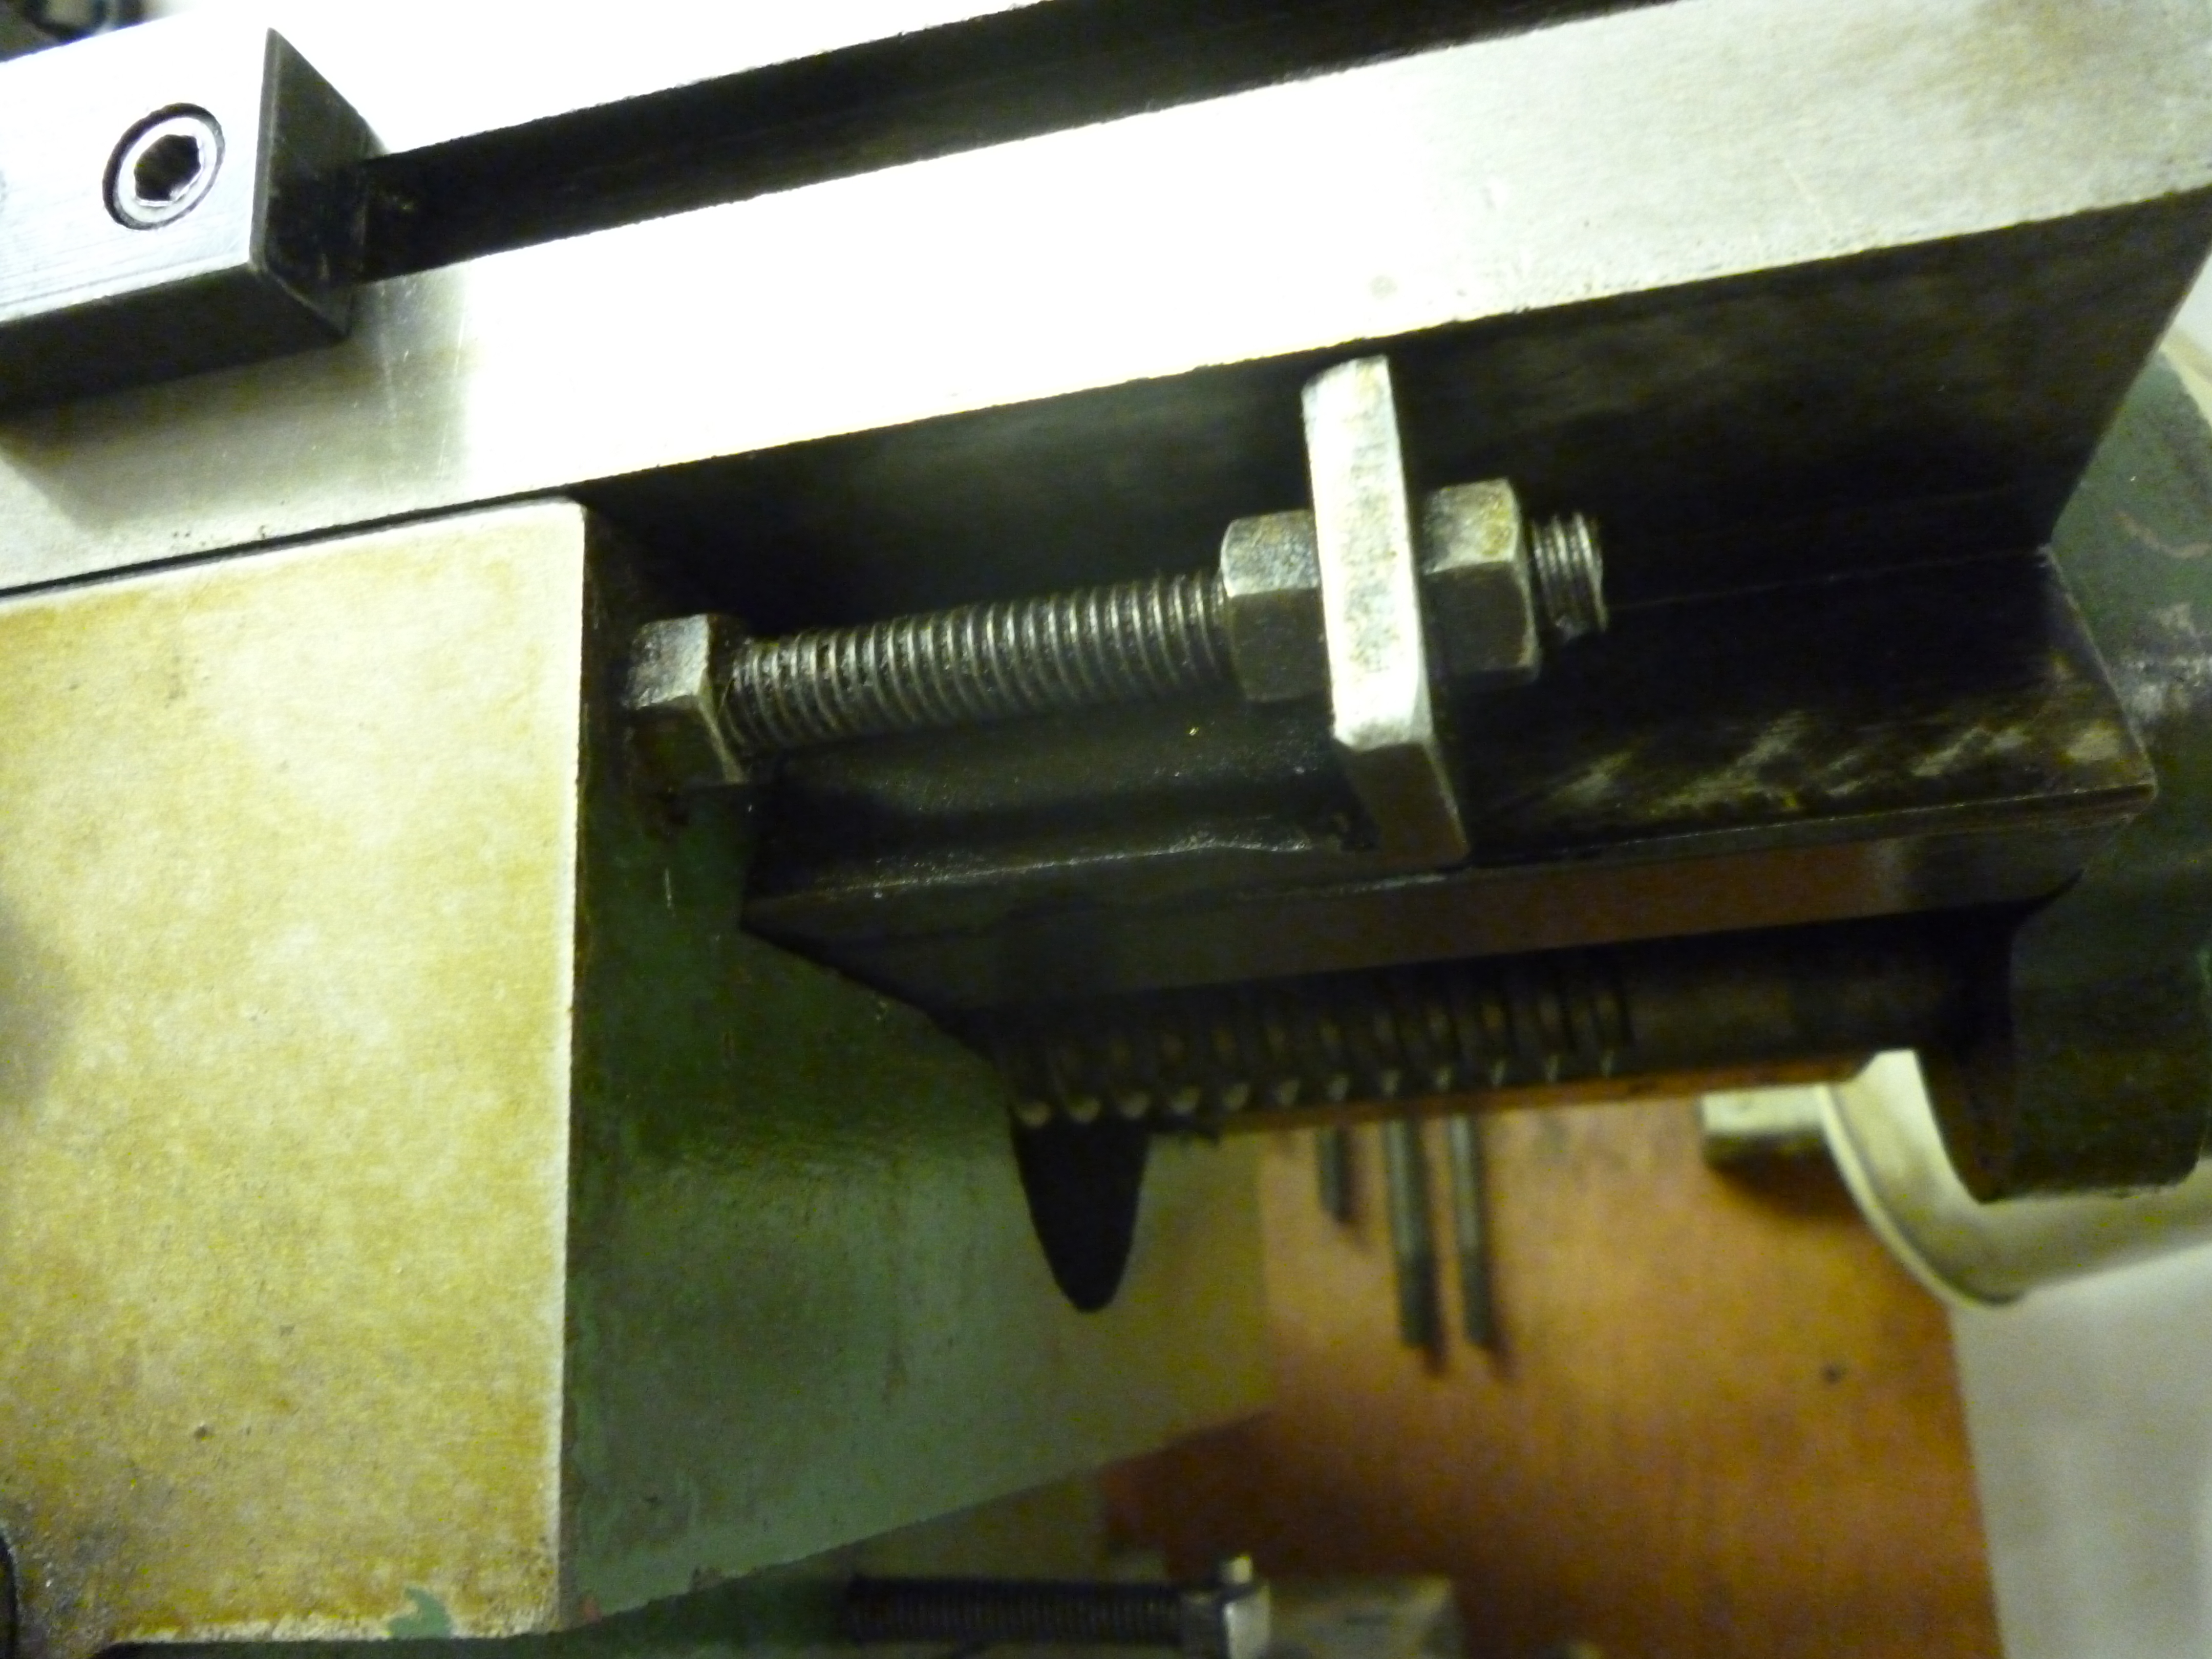
Adjustment of a tapered gib – 623
Calculation for the taper
Suppose the female part of the dovetail is 100mm long. If the taper is 1mm in 100mm then if the taper moves in the female part 10mm the width will change by 0.1mm. A movement of 1mm will change the width by 0.01mm.
Measuring tapered gib dovetails
There is a very important difference between dovetails using parallel gibs and those using tapered gibs. The first can easily be made without measuring anything very accurately. The second has to be accurate.
Measuring the female part
The first problem is that it might be thought necessary to measure into the corners of the female part. There is no way of doing this directly. But it is quite easy to do it indirectly. The method is to use two pieces of accurately ground rod. These are placed in the corners and the space between them is measured. The dimensions of importance are shown in fig. xxx
Fig. measuring a dovetail 1 – 1022
It will be noticed that the depth is critical even though the bottom surface will not come in contact with anything.
Fig. 1023 shows how the missing bit of the width of the female part of the dovetail is determined.
Fig. measuring the bit in the corner – 1023
Measuring the male part
Measuring tapered gibs
It might appear that measuring the gib is difficult. But the technique is completely different. The gib is measure directly at right angles to its two angled surfaces.
Of course this should be slightly different at one end to the other.
The actual width is:
Fig. 1024
Fig. – 1025

Hi thanks for sharing the project. Possible to drop me an email.
Keen to ask more about the taper angles for small mills like Sherline.
Thanks-Steve Wan