go to the page above this one
Side clamps
The surface clamp has the disadvantage that where the clamp is clamped to the workpiece it is not possible to machine at that spot.
One-way round this is the side clamp. (Other ways round this are covered later). There are two sorts of side clamp. The first simply applies a force horizontally to hold the workpiece. It is not easy to get this to hold the workpiece tight against the table but this is often not a problem. This is not a lever like the surface clamp.
Either way there is a horizontal force.
One side clamp has to balance the pressure from a something on the opposite side of the workpiece. This is better than using two side clamps opposite each other. This is because, firstly, there is usually a limited number of side clamps available. Secondly where there are two or more fences on one side of a workpiece they can be lined up relative to each other accurately. If two side clamps are used opposite each other the position of the workpiece can vary. This can be unreliable if the same settings are used for more than one workpiece.
The distance over which a side clamp can be adjusted is often very limited. If it was bolted to the table by just one hole it would often never be able to reach the workpiece. The side clamp has to have a slot for bolting it to the table. It is set up so it is just next to the workpiece to be clamped. Then the adjustable part is used to tighten it against the workpiece.
Often the width of the milling table will not be wide enough to take the workpiece and the side clamps so often the clamping will have to be along the table in the x direction. If the clamps are in the y direction it is esential that the clamps have slots for the bolts in order to fit the T-slots on the milling table.
The workpiece has to be thick enough to resist this horizontal force. Side clamps cannot be used to hold thin material.
Often the side clamp is used to hold fairly thin material. In this case it is useful for the face of the clamp to be low so it does not project above the workpiece. But there are times when a side clamp is needed because surface of the workpiece must be clear but it is quite high. For example suppose we have to machine the edge of a long thin section. We can use pairs of side clamps/fence along it length but we need to hold the workpiece firmly for some height to keep it rigid. In this case we need side clamps with high faces rather than low ones. The solution to this is the have a side clamp that has a high face for thick workpieces but there is an optional add-on face that gives a low face for thinnish workpieces.
Since movement of the jaw on a side clamp is very small it is essential that the clamp has a long slot for clamping so it can be adjusted for whatever size the workpiece is.

Side clamp – 517
fig – homemade side clamp
In this case the screw tightening the clamp is perhaps not really big enough. But it is easy to make.
The usual design uses a large grub screw held in one part to turn against a thread in the fixed part.

1232 side clamp
fig 1232 the inside of the moving part

1233 side clamp
fig 1233 the inside of the fixed part showing the thread. Notice that this thread has been damaged.
side clamp – type 2
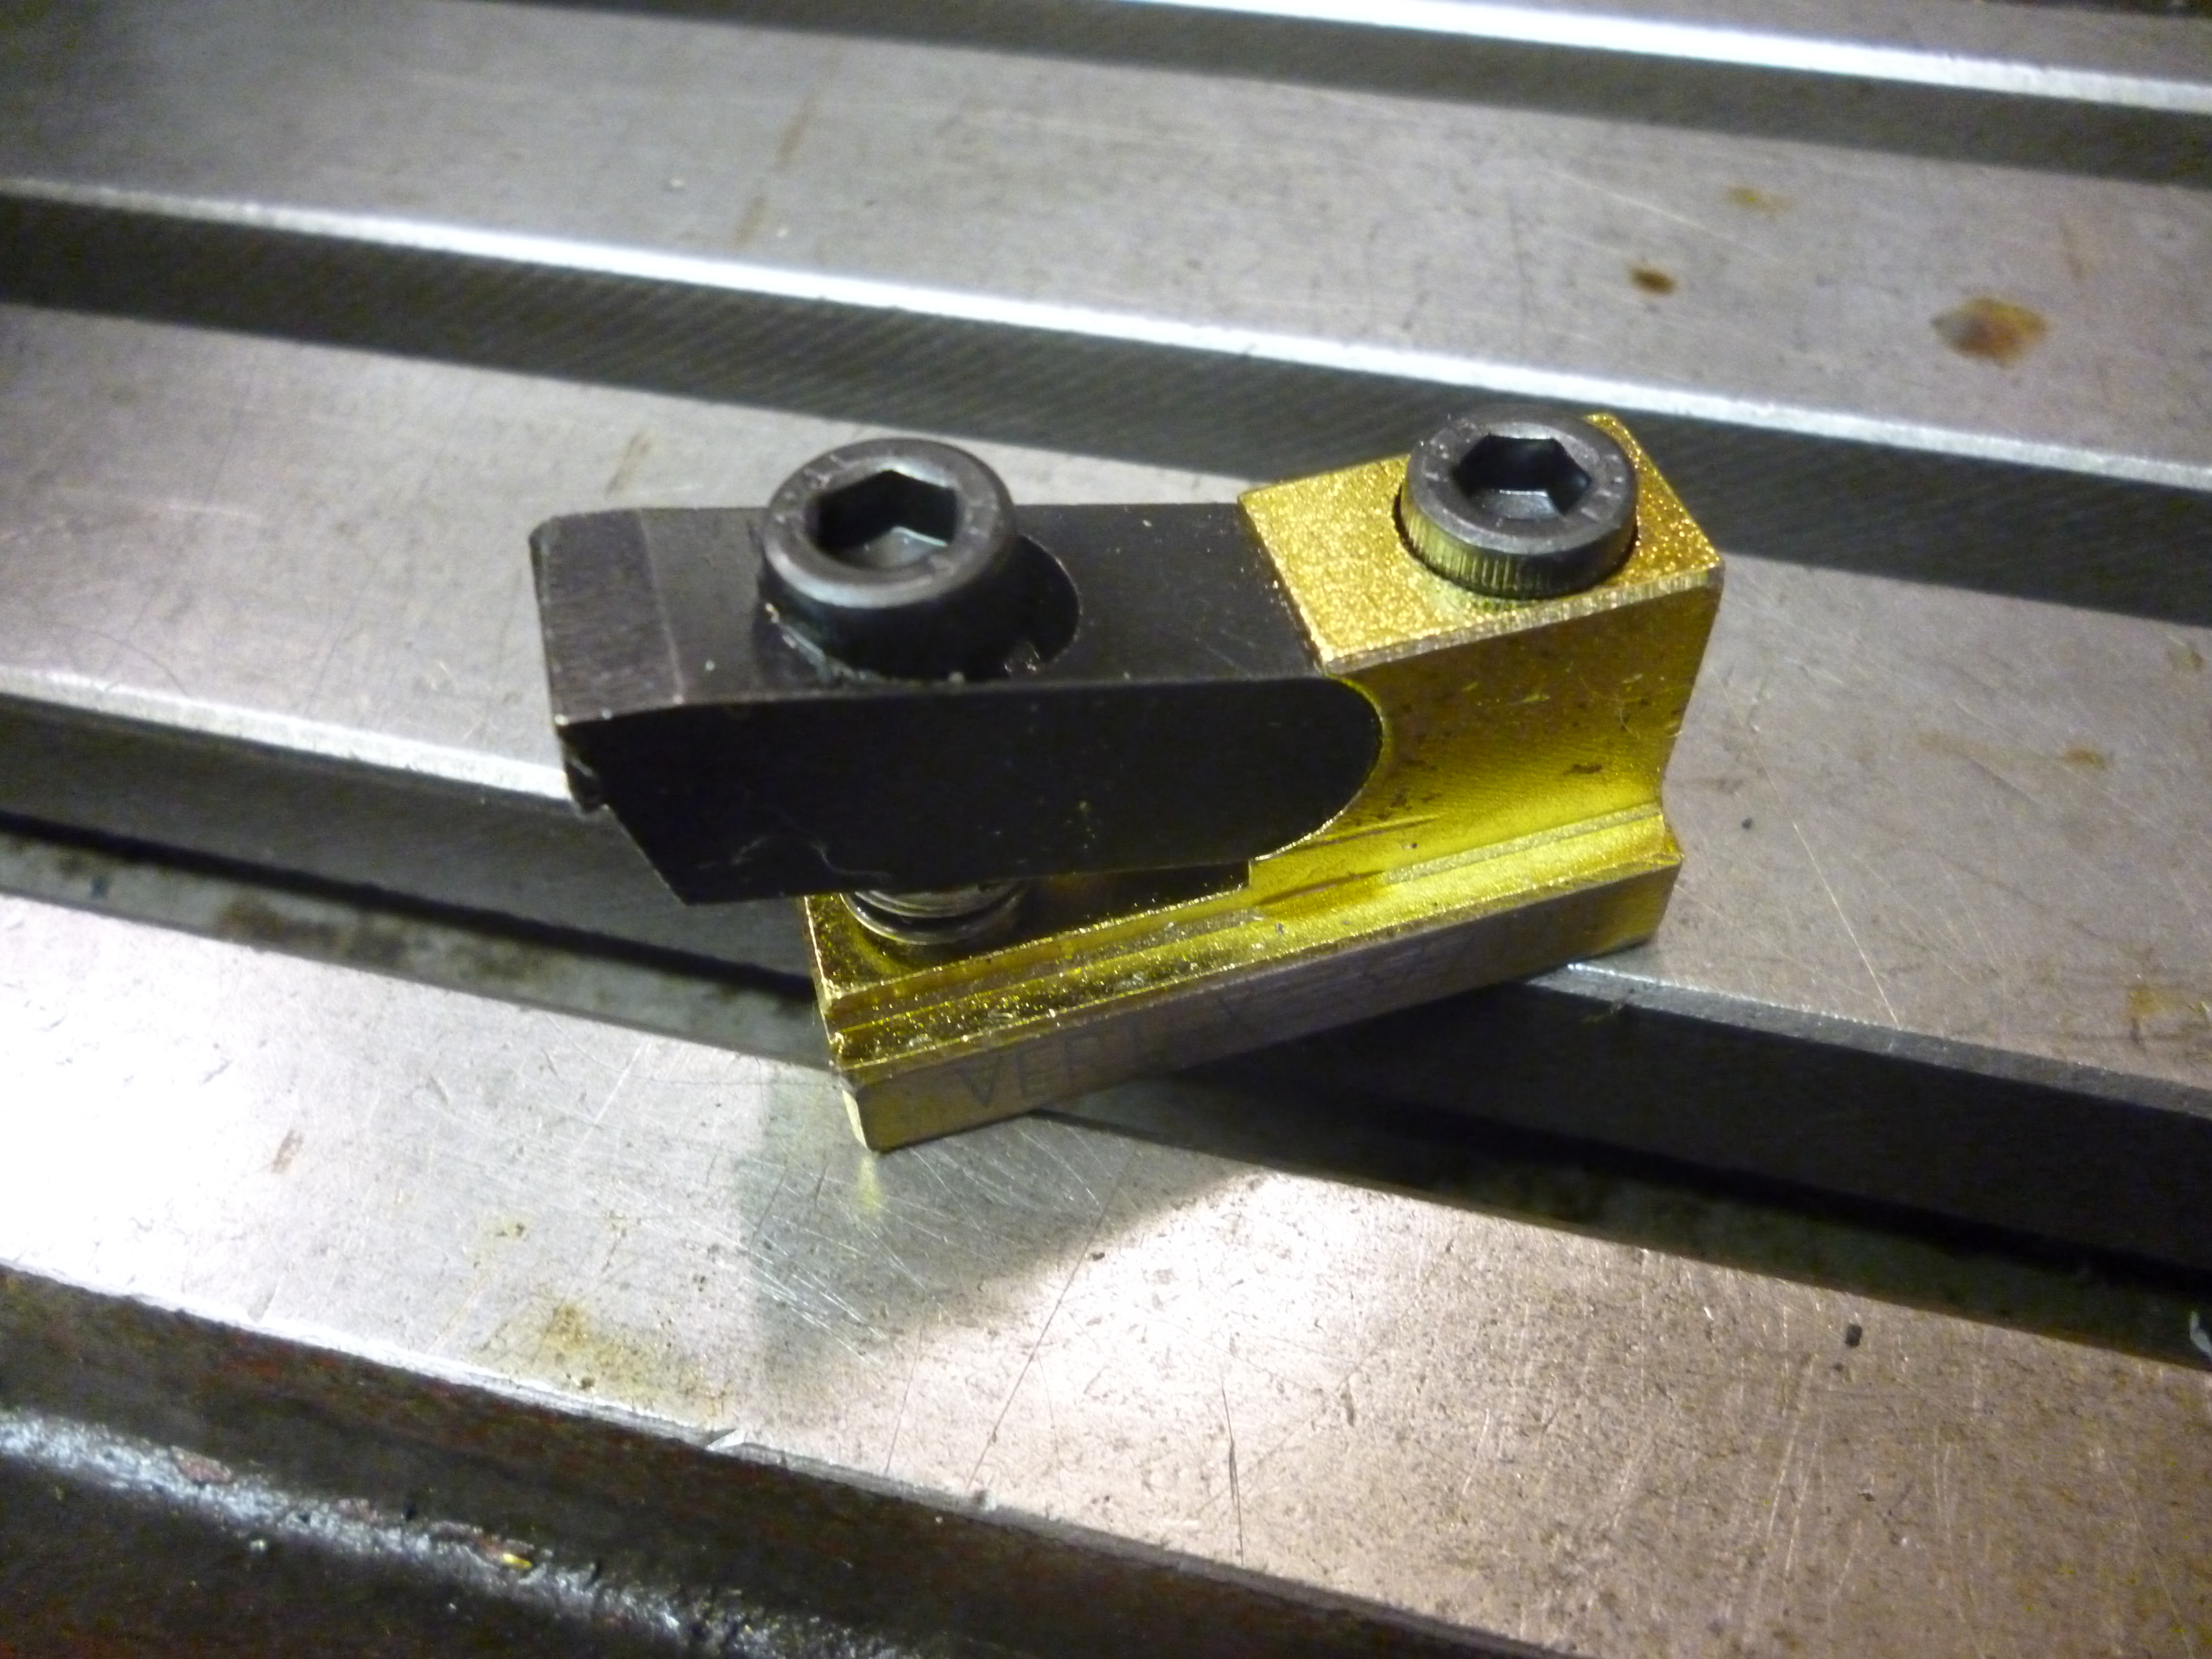
766 side clamp type 2
In this clamp the screw on the right screws down onto the bottom surface of the T-slot. When the screw on the left is screwed down it produces a horizontal force on the workpiece as well as a force downwards. This force can be very large and it can make the clamp slip along the T-slot unless the screw on the right is screwed down hard.

767 side clamp type 2 in use
Due to the way this clamp works, it can only point in the x direction, not across the milling table.
A really good side clamp is shown in the next photo.

790 side clamp
In this case the cap screw pulls the T-nut up against the flanges of the T-slot. The underneath of the body of the clamp is serrated. The result is that this type of side clamp can be tightened harder than the previous type without any risk of breaking a flange of the T-slot.
Where the height of the side clamp might be higher than the height of the workpiece, then the workpiece can be raised using parallels.

793 using side clamp
Low profile side clamps
It is possible to make low profile side claps by simply using a piece of material, say, 6mm thick and drilling and tapping it for grub screws that slope slightly downwards. The standard fence shown elsewhere is too high. to get the thinnest possible fence and clamp the “bolts” used to clamp to the milling table are countersunk cap screws. Ones that tighten with screw slots cannot be tightened up fast enough.
Because the length of the adjusting screws is short the only way this can fit a side anywhere on the milling table is if it lies along the y direction. Hence the holes rather than slots.
For really low workpieces special fence can be used.
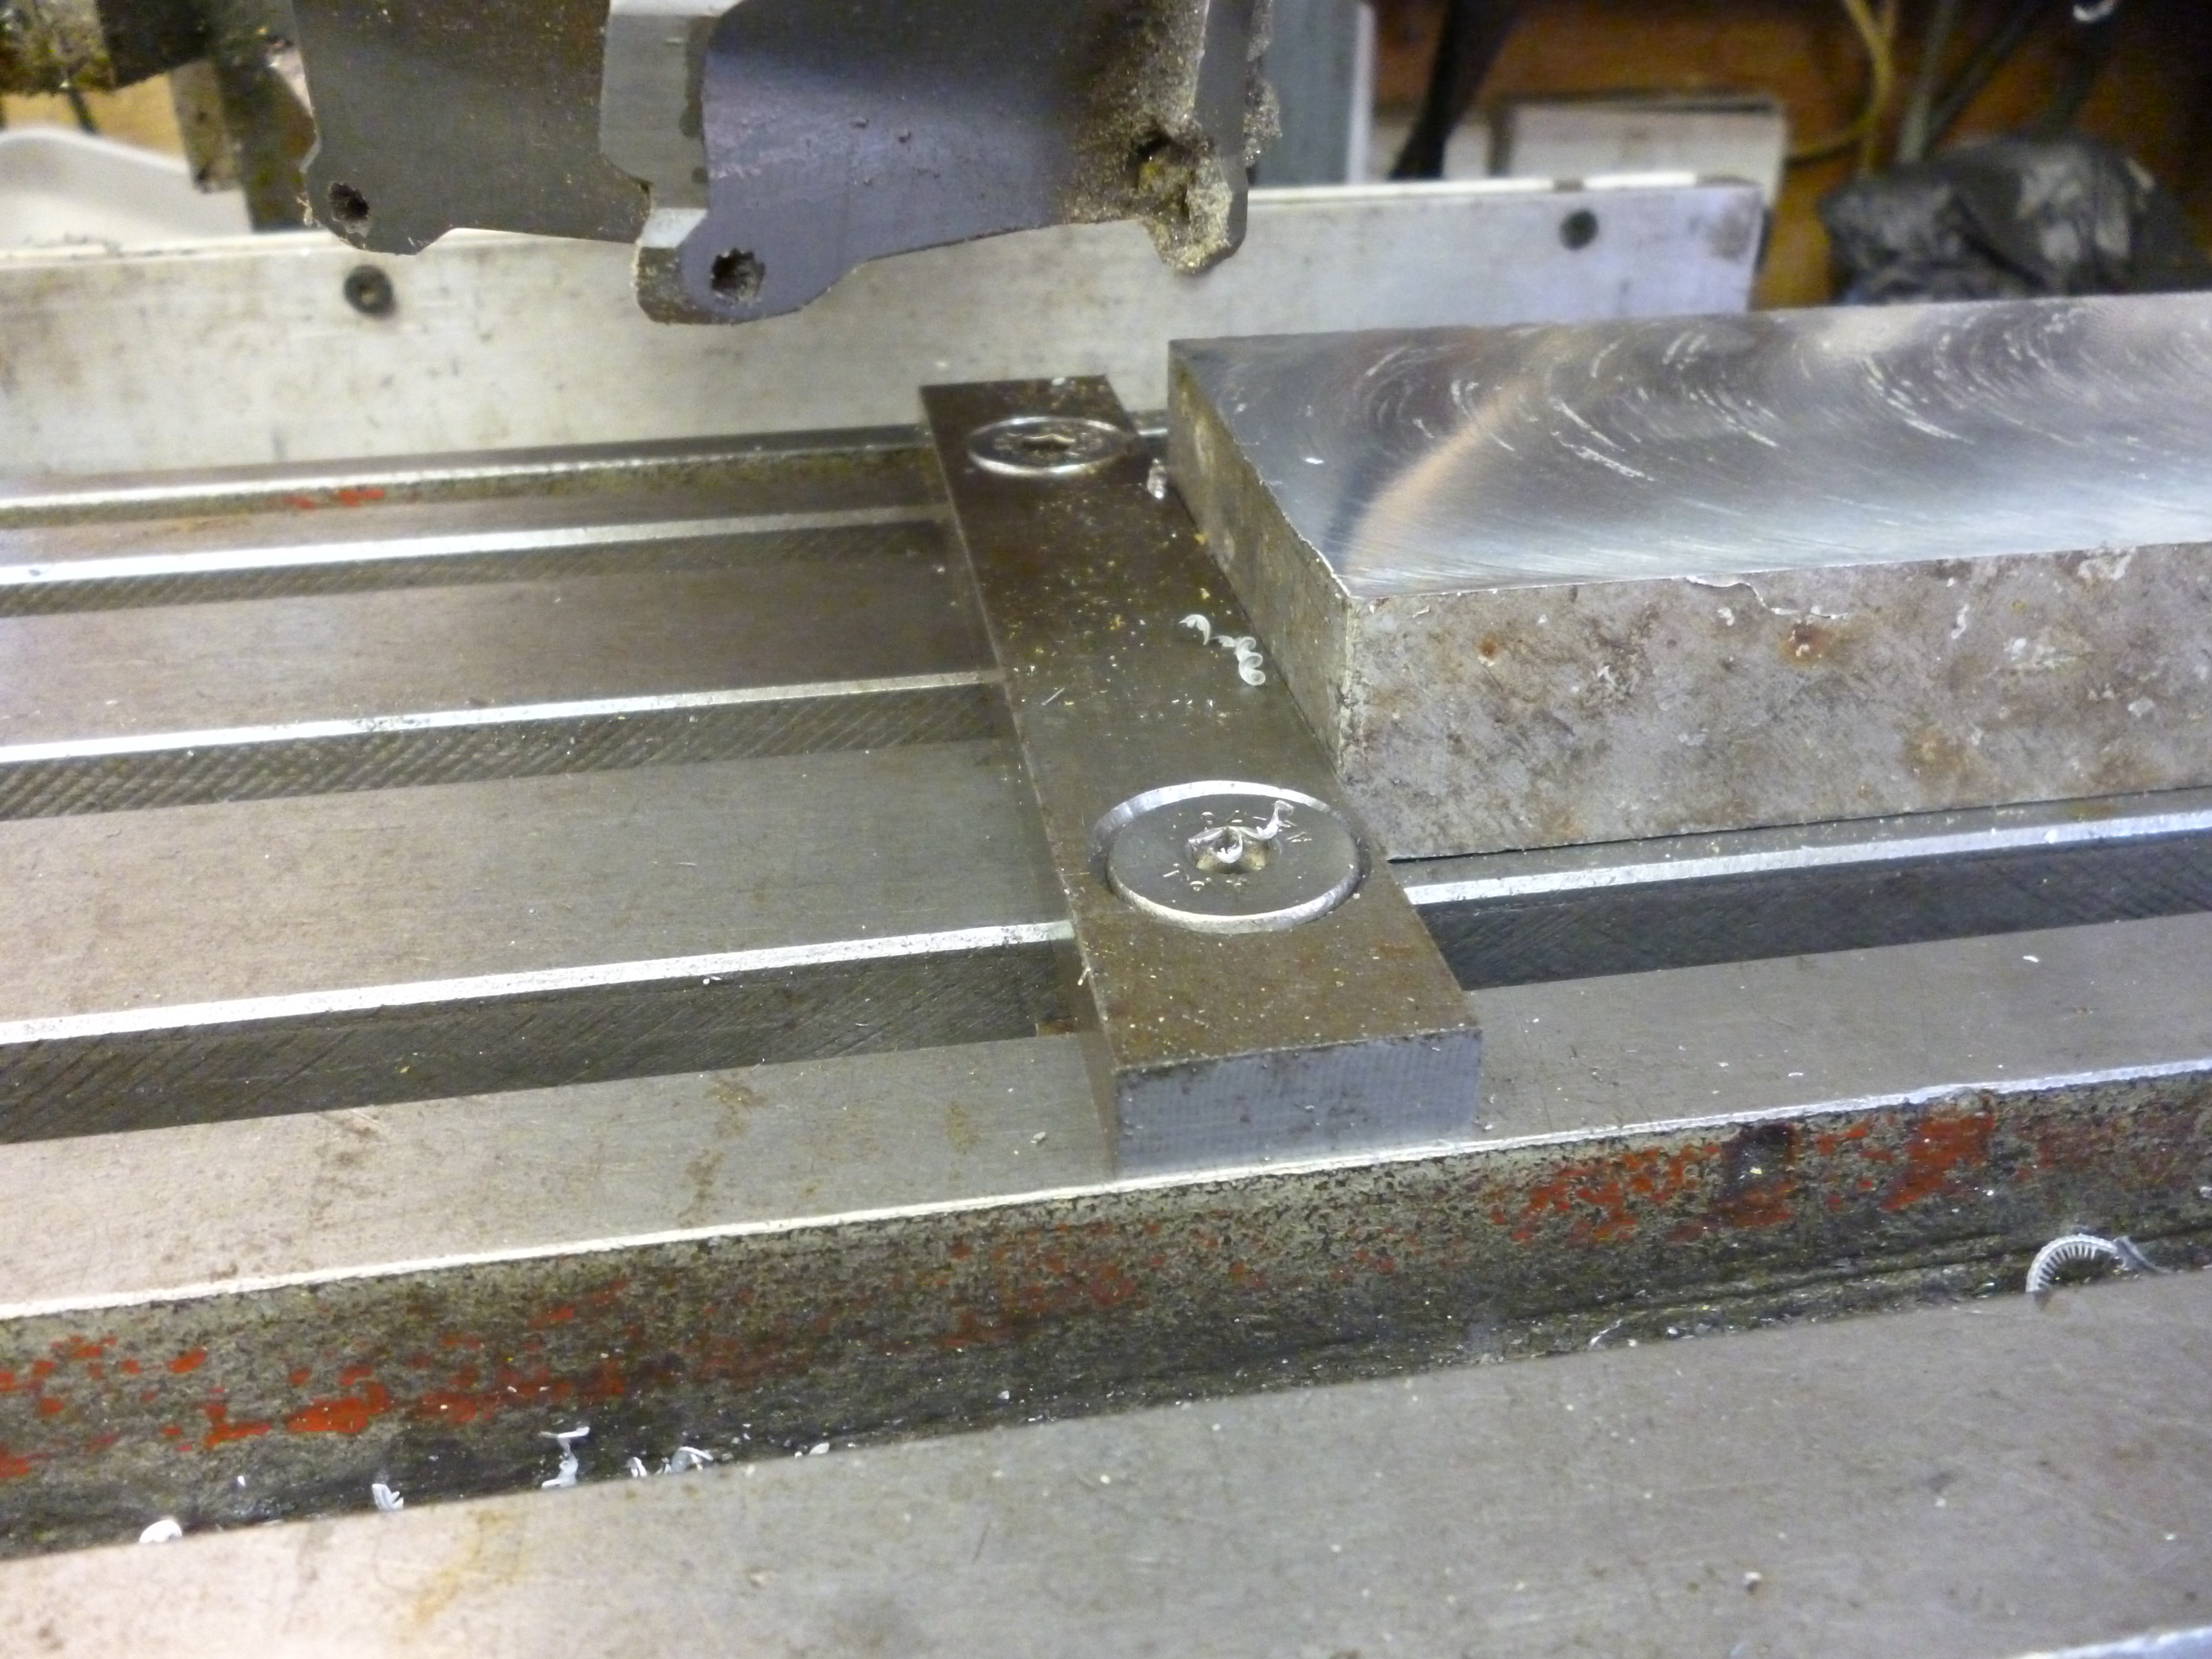
fig special low height fence
Similarly the clamp becomes as shown.

fig extra low side clamp.
Of course, the piece of metal shown here could have been held in a vice because it was so thick. But nothing better could be found.

Dear Sir
Do you have any distrubatour in INDIA If please let us have his details we have some requirements for side clamps
Thanks
Mansoor
Sorry, I dont make things for sale. I just do it for fun.
john f
can I share pictures of this with my engineering class as an example of t-slots and workholding?
Yes, of course.
john f
I found a bunch of these that a machine shop was throwing out and i didnt know how to use them…..until now! Thanks!
Thanks.
These are hard to find. Hang on to them.
There can be great stress on the threaded part so they are often damaged.
john f
who thanks for the article I’ve never seen low profile in the the slot gone to try make a set
for my tiny cnc machine